Once you have set up detention types in Class Charts, staff members will be able to issue detentions for pupils.
There are two main methods for issuing detentions in Class Charts, both of which are explained below:
Issuing a detention in class
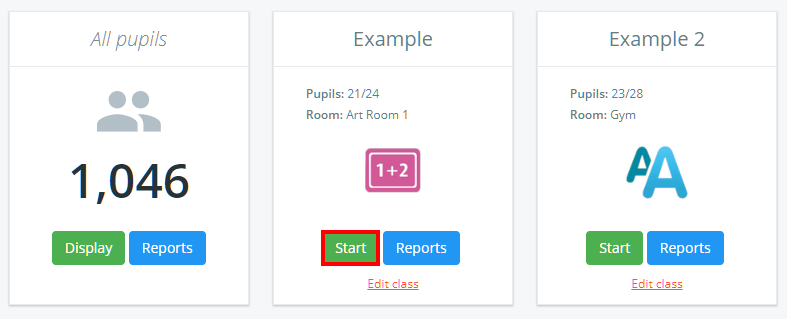
To issue a detention in class, click on the Classes tab along the top of the page and click on the Start class button for the class of your choice.
![]()
You will be presented with the class view page for your selected lesson, where pupils are displayed in their current seats.
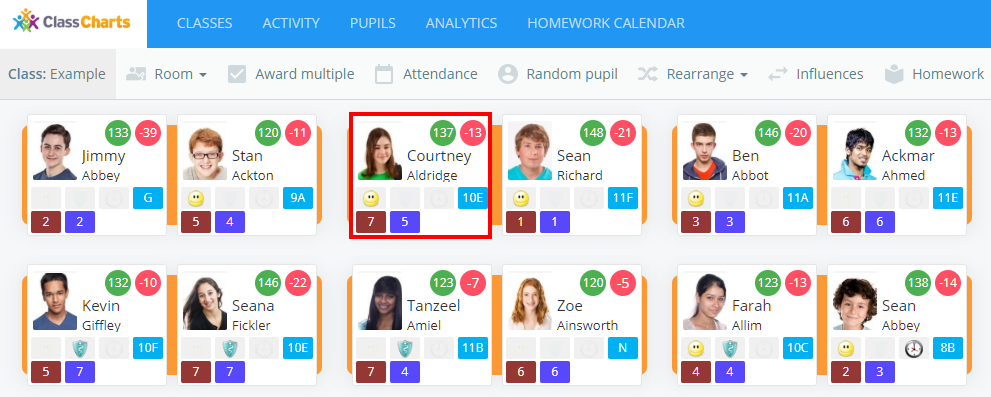
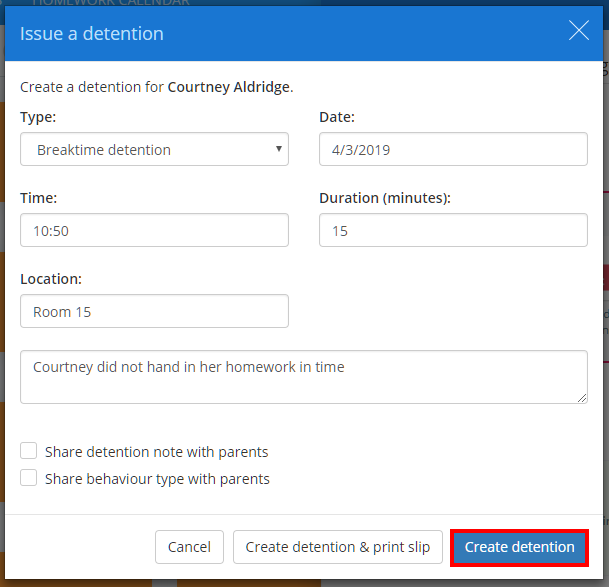
The pupil sidebar will appear with your school’s available behaviours present. Click on a behaviour that has been set up to issue a detention to the pupil.
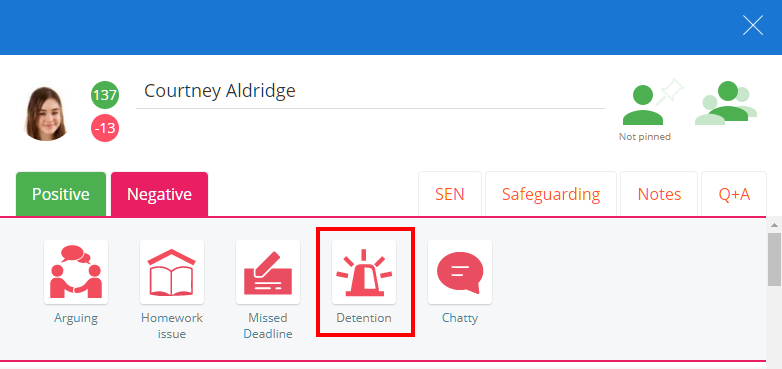
The Issue a detention popup will appear. Enter the details of your choice into the available fields and click on the Create detention button.
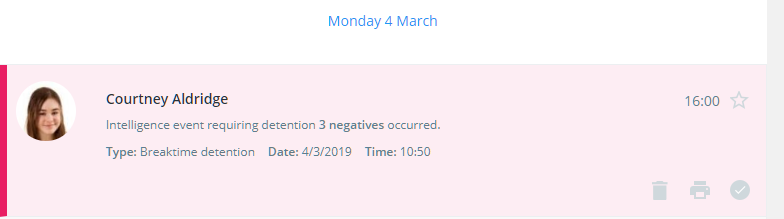
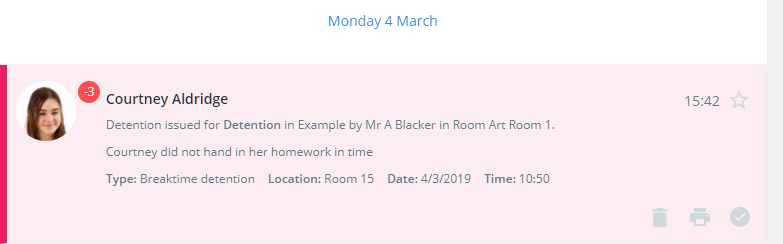
The newly issued detention will now appear in the pupil’s activity feed, as well as the school wide activity feed.
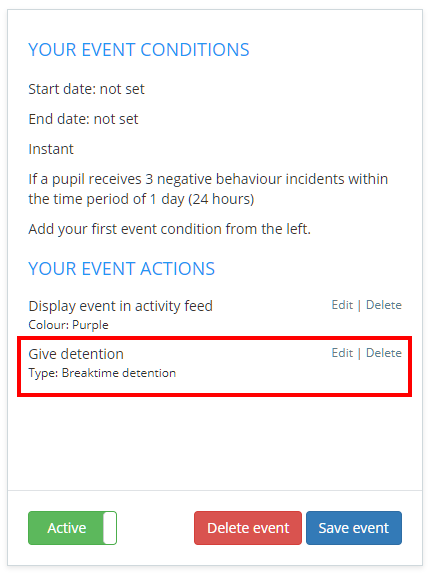
Issuing a detention through intelligence events
If you have set up intelligence events in your school, you can also issue automatic detentions.
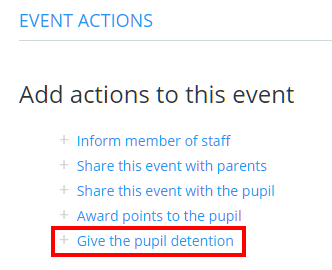
To do this, click on the Give the pupil detention option under the Event actions section when creating or editing an event.
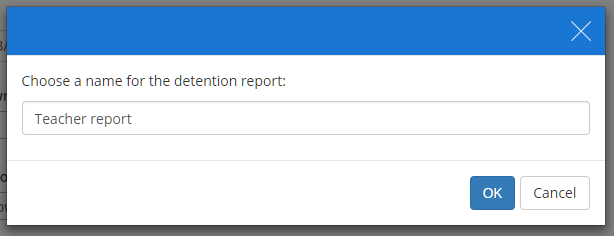
Select the detention type of your choice and click on the OK button.
The chosen detention type will now appear in the summary box for the intelligence event. Click on the save event button to confirm your changes.
When a pupil meets the required conditions for the intelligence event, they will trigger the event and be automatically issued the chosen detention type.