By default, intelligence events will trigger as soon their criteria has been met by a pupil. This can be changed so that the event calculations are delayed until the end of the day or week.
To set up a delayed event, click on the Analytics tab at the top of the page.

Next, select Behaviour Events from Intel events sub menu on the left hand side.

You will be presented with a list of intelligence events that have been set up in your school’s Class Charts account.
Click on the Add intelligence event button in the top right hand corner to start creating a new event.

A popup will appear, asking you to name your event. Provide a name for the intelligence event and click on the OK button.

You will be redirected to the Set up intelligence event page, where you can define how your event should work.
A summary of the intelligence event so far will be displayed on the right hand side of the page.

Setting an event to delayed
To set an intelligence event to delayed, click on the radio button labelled Delayed.

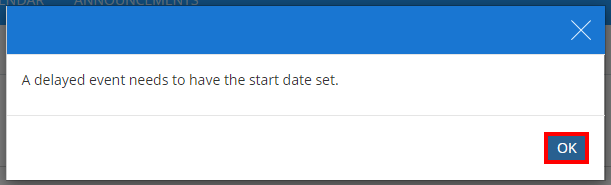
A warning popup will appear if a start date has not been set yet.
Specifying the criteria that will trigger the delayed event
Next, select the criteria that need to be met by pupils in order for the delayed intelligence event to trigger.
The first drop control the threshold required to trigger the event. The available options are explained in more detail below:

At least number of points/incidents
The event will fire if the pupil has met or exceeded the amount points/incidents required by the end of the chosen time period.
Exactly number of points/incidents
The event will fire if the pupil has been awarded the exact amount of points/incidents by the end of the chosen time period.
At most number of points/incidents
The event will fire if the pupil has met or has less than the amount of points/incidents required by the end of the chosen time period.
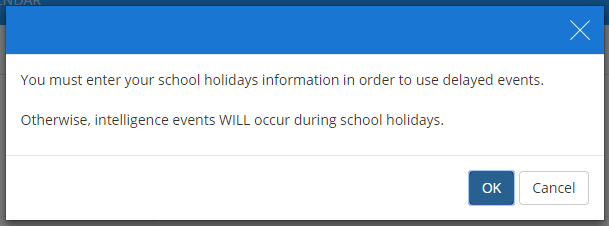
If your school has not set up school holidays, a warning popup will appear when a delayed event option is selected. Doing so will prevent the delayed event from firing outside of term time.
The second drop down menu allows you to set the time period that the pupil can trigger the event in.

You can restrict the event so that pupils cannot trigger it more than once. Tick the Only once per pupil checkbox to prevent pupils from triggering the event a second time.

Activating the intelligence event
Once you’re happy with the way the intelligence event has been set up, it can be saved and activated.
Click on the Inactive button in the Summary box to set the event to Active. This means that the event can now be triggered by pupils.
To save the intelligence event, click on the Create event button in the Summary box .

A popup confirmation will appear, indicating that the event has been saved.

Click on the Return to list button to leave the page and go back to the list of intelligence events.